Rosetta on Mac M1 is an emulation software developed by Apple which allows for Intel-based macOS apps to be run on Macs with M1 chips. Once Rosetta is installed on the M1 Mac, it works automatically whenever an Intel-based macOS app is opened.

Although Intel and M1 Macs both use the same macOS system, the Intel CPUs and the M1 chips have different architecture, which prevents apps developed for one type of processor to be run on a system powered by the other. Since Apple used to develop only Intel-based Macs up until a couple of years ago, all macOS apps were developed to be compatible with the Intel CPU architecture. With the release of the M1 chip and Mac models powered by its variations, all macOS apps developed for Intel Macs needed to be updated to run natively on M1 Macs. While all the base macOS apps can run natively on M1 chips, many popular third-party apps are still only available for the Intel architecture. For this reason, Apple has come up with an effective solution that would allow M1 users to still run their favorite third-party apps even if those apps don’t have M1 versions. That solution is an emulation tool called Rosetta (more accurately, Rosetta 2) which lets you seamlessly run any Intel-based macOS app on an M1 Mac with little to no performance hiccups.
To download Rosetta on Mac M1, the easiest way is to simply start an Intel-based macOS app that requires Rosetta 2 to run on an M1 Mac. Once you do that, the system will show a Rosetta 2 download prompt where you must click Install.
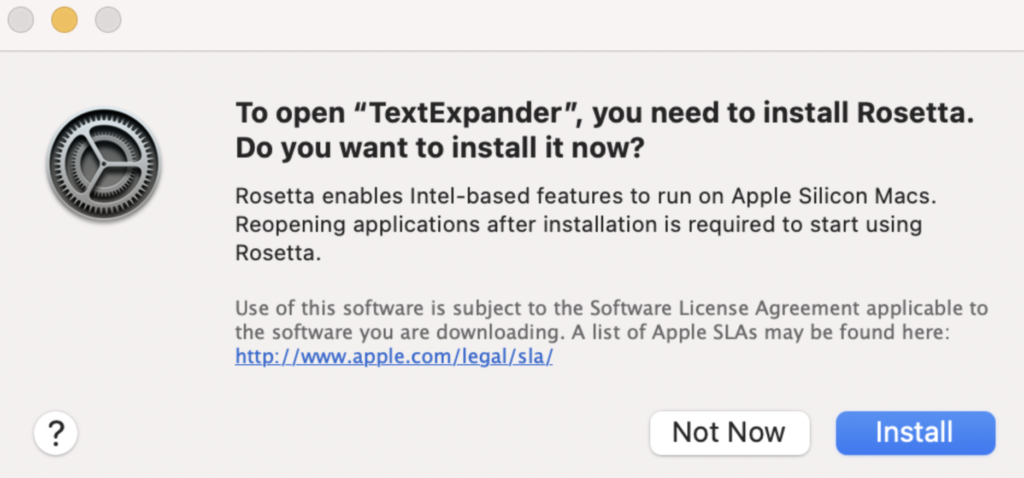
This is all that it takes to install Rosetta (Rosetta 2) on an M1 Mac. Once the software gets installed, you won’t need to manually start it in order to run Intel-based macOS apps. The emulation software would work automatically and, in most cases, you shouldn’t notice any difference in performance between how the given app behaves on your M1 Mac as compared to how it would run on an Intel Mac.
To install Rosetta on Mac M1, just launch an app that requires the emulation to run on M1 Mac and select Install on the Rosetta 2 installation prompt that shows up. Alternatively, you can install Rosetta by running the softwareupdate –install-rosetta –agree-to-license command in Terminal.
If, for some reason, you don’t get the Rosetta installation prompt when starting an app that requires Rosetta to run on M1 Macs (and you don’t yet have Rosetta installed), using the aforementioned Terminal command is another quick and easy way to get the emulator. Simply go to Finder > Applications > Utilities, start the Terminal app, copy-paste the softwareupdate -install-rosetta -agree-to-license command in it, and press Enter to execute it. If you get asked for an Admin password, type the password. You won’t see any characters getting typed, but that’s okay – the characters would simply be hidden, so just type the password and press Enter again to confirm it and to perform the entered command.
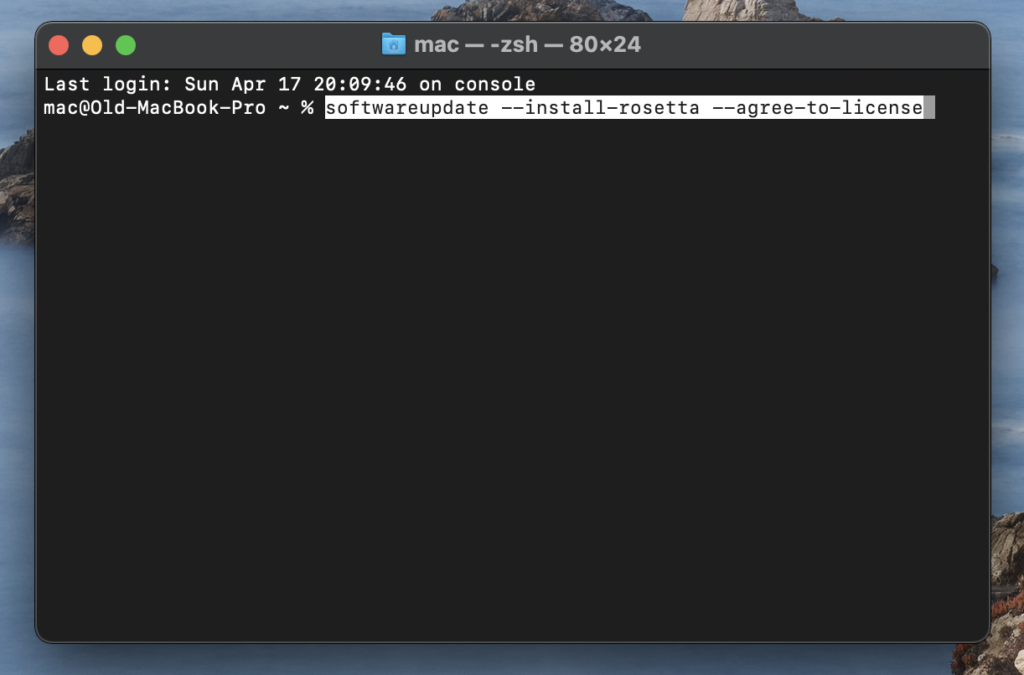
There’s no need to go into any more advanced steps to manually download and install Rosetta (Rosetta 2), as Apple has made sure that it’s as easy as possible for M1 Mac users to get the emulator without needing to spend time searching for it. Once Rosetta is on your Mac, you won’t notice its presence and running apps that require emulation would happen seamlessly as if no emulator was being used. As we mentioned, Rosetta would be used automatically for apps that require it.
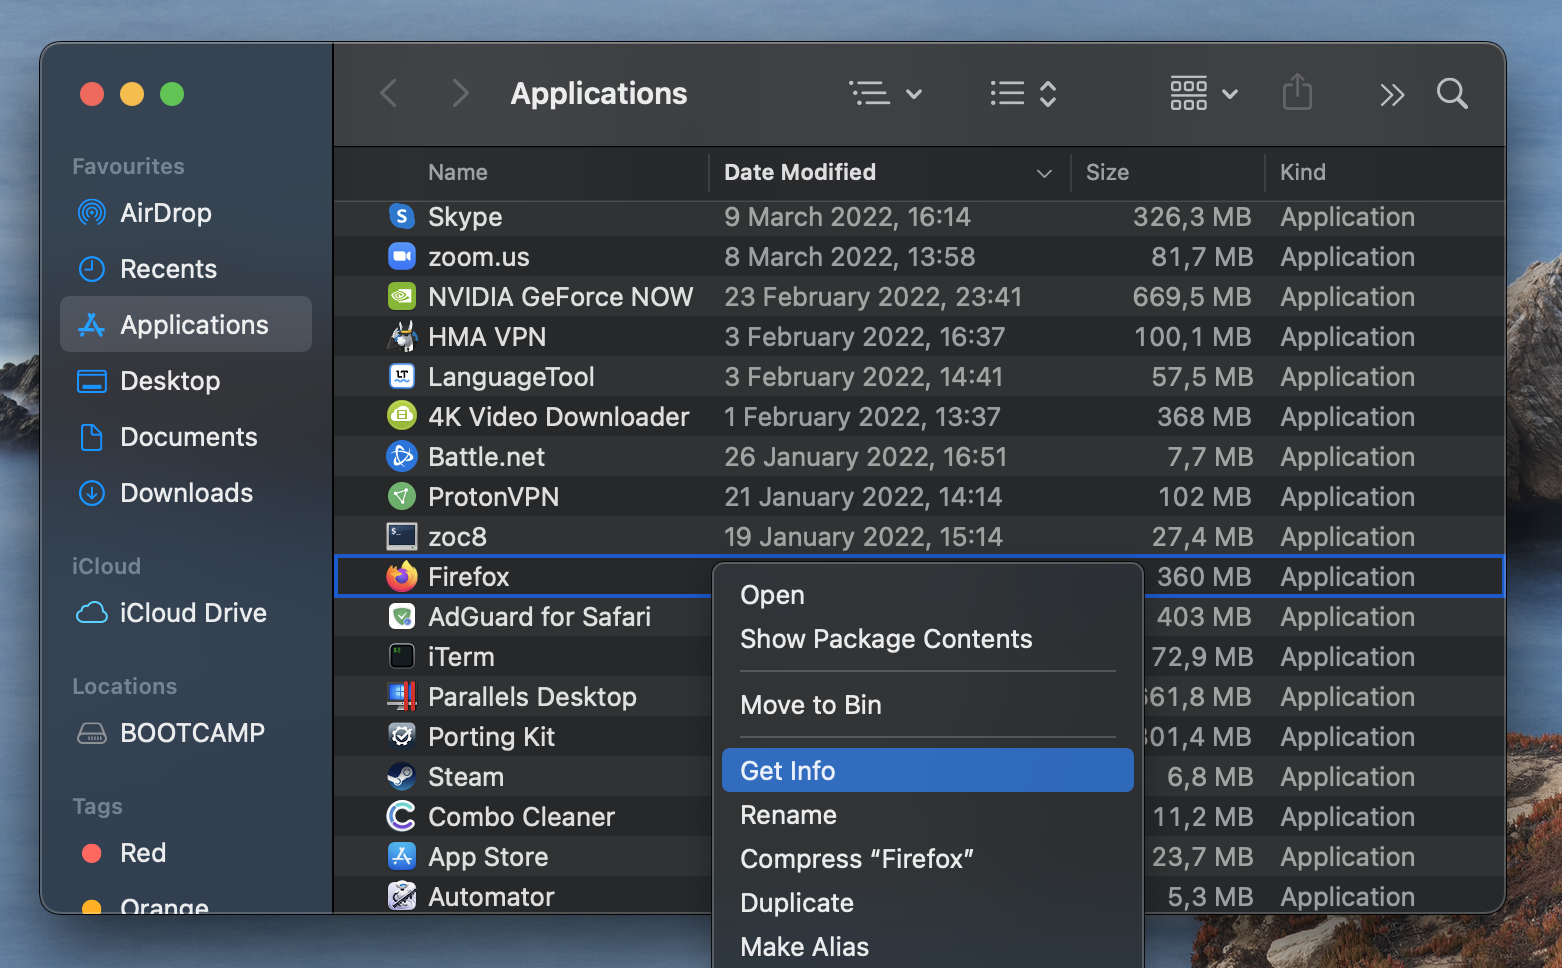
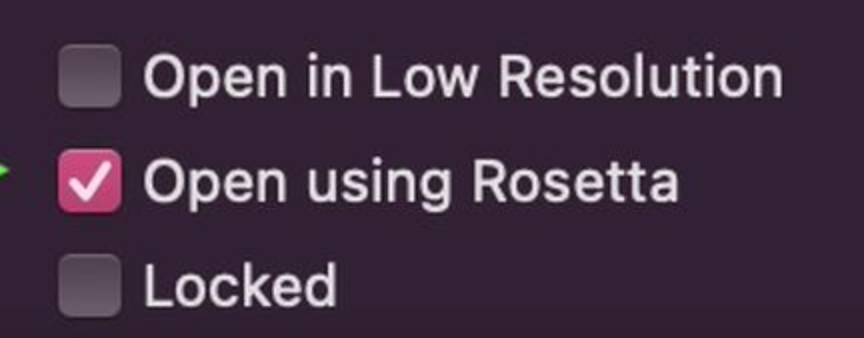
However, if a certain app on your Mac has already been updated to run natively (without emulation and the need for Rosetta) on your Mac, that native version of the app would be run by default and Rosetta won’t be getting used in such situations. Obviously, this makes sense, but it’s possible that some features of the Intel-based version of the specific app are still lacking in its M1 version or maybe there’s another reason why the Intel version is better. For example, you may want to use browser extensions for a given browser, but the extensions are only available for the Intel version of the browser and not for the M1 version. In such cases, you may prefer to run the Intel variant of the app using Rosetta rather than using the native M1 version. In order to do that, you’d need to manually set the app to use Rosetta 2, because the default setting is for the native version for M1 to be used instead. Here’s an easy way to do this:
To check if Rosetta is installed on your Mac M1, simply try running any app that has not yet been updated to run natively on M1 Macs. If a Rosetta installation prompt doesn’t show up, this means Rosetta is already installed on your Mac M1.
Note that you don’t really need Rosetta for anything other than running apps that are yet to be updated to work natively with M1 chips. If you don’t have Rosetta but none of the apps in your Mac require it to run on the computer, then you don’t really need the tool, unless you’d prefer to run the Intel version of a given app. For such cases, you can use the aforementioned Terminal command to install Rosetta and then check the Open using Rosetta setting in the Info window of the specific app (as shown above) to tell your system to run the Intel version of the app instead of the M1 version.